I started learning Go a few months back but I don’t really get time to experiement since I am very busy with work. The only time I get to do some “real” learning is when I am on vacation leave. I believe the best way to learn is to try out some examples and implement simple use cases. Microservices are the buzzword lately so I thought of creating a simple microservice using the Go Language which connects to a MongoDB NoSQL database, compiled using Docker a multi-stage build, and deployed as a Docker container.
Here are the requirements:
-
The microservice needs to expose 2 HTTP endpoints
- GET /jobs - this endpoint should return a list of jobs retrieved from a MongoDB database
- POST /jobs - this endpoint should be able to accept a json string and save it to a MongoDB database
-
The microservice needs to be deployed as a Docker container
- The docker image should be small
- MongoDB should be running as a Docker container as well
Since it is important to be able to test the microservice with MongoDB, let’s start with #3.
Running a MongoDB docker container is pretty straightforward. To make things simpler, let’s use docker-compose. Here is the docker-compose.yml file we’ll use.
version: '3'
services:
  mongodb:
    image: mongo
    ports:
      - "27017:27017"
    volumes:
      - "mongodata:/data/db"
    networks:
      - network1

volumes:
   mongodata:

networks:
   network1:
File can be copied from here: https://github.com/donvito/learngo/blob/master/mongo-microservice/mongodb/docker-compose.yml
Save this as docker-compose.yml. This compose file binds the host machine’s(your laptop or VM) port to MongoDB’s. If this port is used in the host machine, just change the port no. - ”27017:27017”. The left one is the host machine’s port.
If you’d like to just run MongoDB as a container without bothering with docker-compose, you can do so as well. Just follow the steps in MongoDB’s dockerhub.
After saving the file, spin up the the MongoDB docker container using this command. Make sure you are in the same directory as the compose file.
$ docker-compose upYou’ll see some similar output below. For now, let’s not set the username and password. You can do that later.
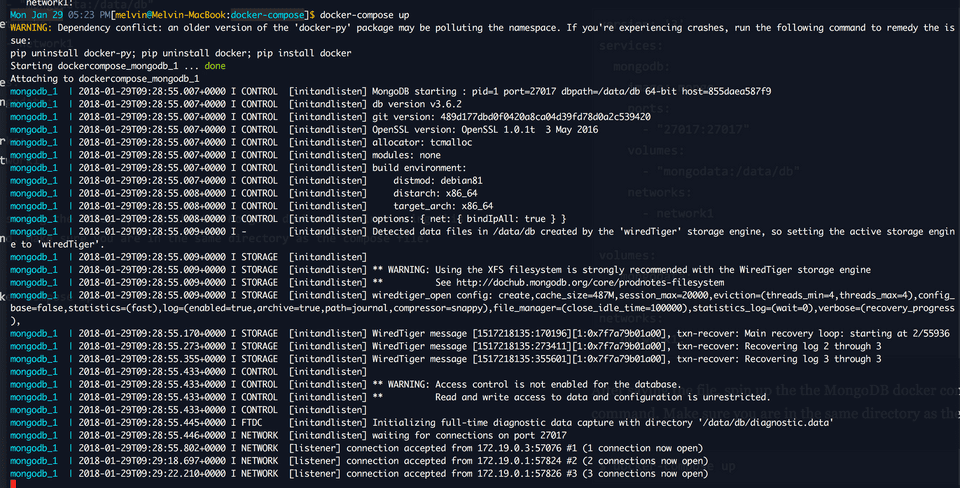
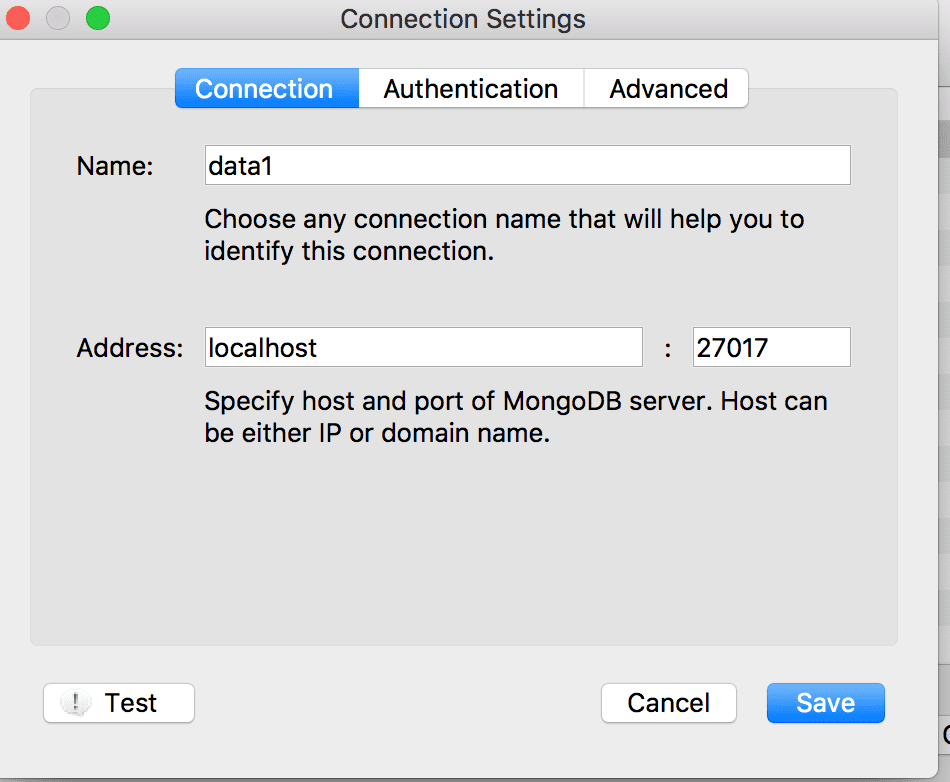
Once MongoDB is up, you can now test it using a MongoDB client. I use Robomongo. Since we’ve configured it to bind to our local host machine, you can configure Robomongo to connect to it. Name does not matter, what is important is the address and port.
Good! So now we have our MongoDB running. Next step is to create the ff:
- Create a DATABASE named “db”
- Create a COLLECTION named “jobs”
So MongoDB is ready!
Next step is to create the microservice. I’ve already created the application, you can just download it from my learngo github repo.
Copy the main.go file from here. https://github.com/donvito/learngo/blob/master/mongo-microservice/multistage/main.go
The dependencies we need are the ff.:
import (
	"encoding/json"
	"fmt"
	"log"
	"net/http"
	"time"
	"io/ioutil"

	"github.com/gorilla/mux"
	"gopkg.in/mgo.v2/bson"
	"gopkg.in/mgo.v2"
)
The MongoDB driver used is from labix https://labix.org/mgo
To put configuration in one place, I’ve added it as constants
const (
	hosts      = "dockercompose_mongodb_1:27017"
	database   = "db"
	username   = ""
	password   = ""
	collection = "jobs"
)
I also created a struct which will be the data structure of the data to be saved in the database.
type Job struct {
	Title       string `json:"title"`
	Description string `json:"description"`
	Company     string `json:"company"`
	Salary      string `json:"salary"`
}
Here is the method which initialises the MongoDB session. Timeout is set to 60 secs.
func initialiseMongo() (session *mgo.Session){

	info := &mgo.DialInfo{
		Addrs:    []string{hosts},
		Timeout:  60 * time.Second,
		Database: database,
		Username: username,
		Password: password,
	}

	session, err := mgo.DialWithInfo(info)
	if err != nil {
		panic(err)
	}

	return
}
So here are the HTTP endpoints required for requirement #1. I used gorilla mux router for URL routing. I separated the 2 handlers so I don’t have to do an if/else inside a common handler.
router := mux.NewRouter().StrictSlash(true)
router.HandleFunc("/jobs", jobsGetHandler).Methods("GET")
router.HandleFunc("/jobs", jobsPostHandler).Methods("POST")
These are handled by 2 additional methods.
func jobsGetHandler(w http.ResponseWriter, r *http.Request) {

	col := mongoStore.session.DB(database).C(collection)

	results := []Job{}
	col.Find(bson.M{"title": bson.RegEx{"", ""}}).All(&results)
	jsonString, err := json.Marshal(results)
	if err != nil {
		panic(err)
	}
	fmt.Fprint(w, string(jsonString))

}

func jobsPostHandler(w http.ResponseWriter, r *http.Request) {

	col := mongoStore.session.DB(database).C(collection)

	//Retrieve body from http request
	b, err := ioutil.ReadAll(r.Body)
	defer r.Body.Close()
	if err != nil {
		panic(err)
	}

	//Save data into Job struct
	var _job Job
	err = json.Unmarshal(b, &_job)
	if err != nil {
		http.Error(w, err.Error(), 500)
		return
	}

	//Insert job into MongoDB
	err = col.Insert(_job)
	if err != nil {
		panic(err)
	}

	//Convert job struct into json
	jsonString, err := json.Marshal(_job)
	if err != nil {
		http.Error(w, err.Error(), 500)
		return
	}

	//Set content-type http header
	w.Header().Set("content-type", "application/json")

	//Send back data as response
	w.Write(jsonString)

}
Lastly, here is the code that spins up the http server of the microservice. You can change the port as you wish. But, note that you need to do some modifications to the Dockerfile to build and deploy the microservice to Docker.
log.Fatal(http.ListenAndServe(":9090", router))For requirement #2, since we are using Go and Docker already supports multi-stage builds, I’ve created a Dockerfile to build this Go microservice.
Here is the single Dockerfile. The first block of code builds the the application. The second block of code creates the docker image which can be deployed as a docker standalone container or as a service in Swarm or Kubernetes. Note that the EXPOSED PORT 9090 here should be the same port the microservice is running on.
FROM golang:1.9.2 as builder
ARG SOURCE_LOCATION=/
WORKDIR ${SOURCE_LOCATION}
RUN go get -d -v github.com/gorilla/mux \
	&& go get -d -v gopkg.in/mgo.v2/bson \
	&& go get -d -v gopkg.in/mgo.v2
COPY main.go .
RUN CGO_ENABLED=0 GOOS=linux go build -a -installsuffix cgo -o app .

FROM alpine:latest
ARG SOURCE_LOCATION=/
RUN apk --no-cache add curl
EXPOSE 9090
WORKDIR /root/
COPY --from=builder ${SOURCE_LOCATION} .
CMD ["./app"]
This Dockerfile can be download from the same repo https://github.com/donvito/learngo/blob/master/mongo-microservice/multistage/Dockerfile
Cool, so we now have our building blocks! We can now build and run the microservice in Docker.
To make things simpler, here are the steps to get the microservice up and running in Docker.
-
First, do a git clone of the repo, let’s assume you download it in the /Users/melvin/Downloads directory
$ git clone https://github.com/donvito/learngo.git
$ cd learngo/mongo-microservice/multistage/
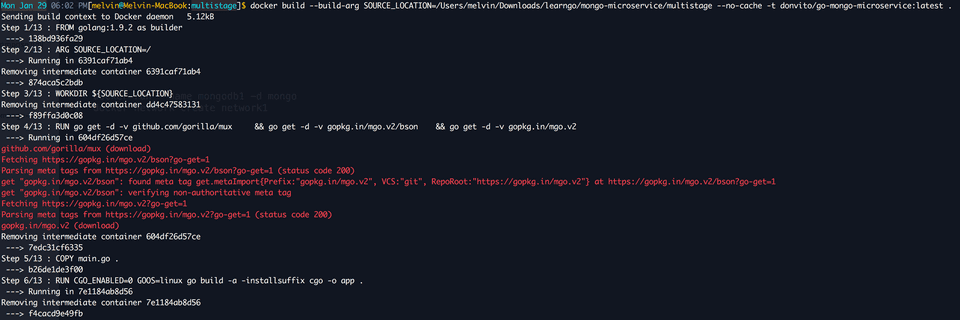
After you’ve cloned and moved to the multistage directory, you can now build the microservice source code using the Dockerfile. Here is the command. SOURCE_LOCATION is the multistage directory of the project. It is where the source code of the microservice can be found.
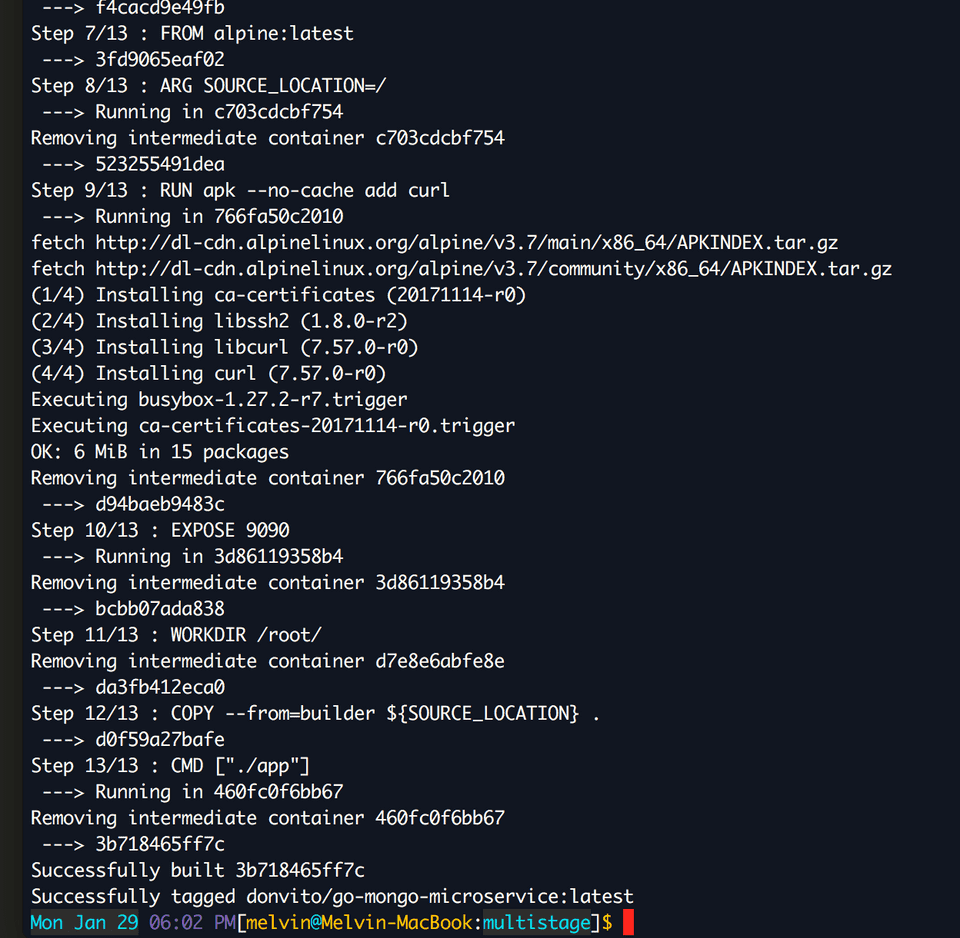
$ docker build --build-arg SOURCE_LOCATION=/Users/melvin/Downloads/learngo/mongo-microservice/multistage --no-cache -t donvito/go-mongo-microservice:latest .Steps 1 to 6 is the compiling of the microservice’s source code into a binary.
Steps 7 to 13 is creating the final docker image with the binary.
To check if the docker image is created, just to a $docker image ls. Notice that the docker image is only 13MB!

To run the microservice, use this command. Note that I binded to my machine’s port 8000 since 9090 is not available anymore.
docker run --name go-mongo-microservice -d --rm -p 8000:9090 --network dockercompose_network1 donvito/go-mongo-microservice:latestTo check if the service is running, just do a $docker ps.
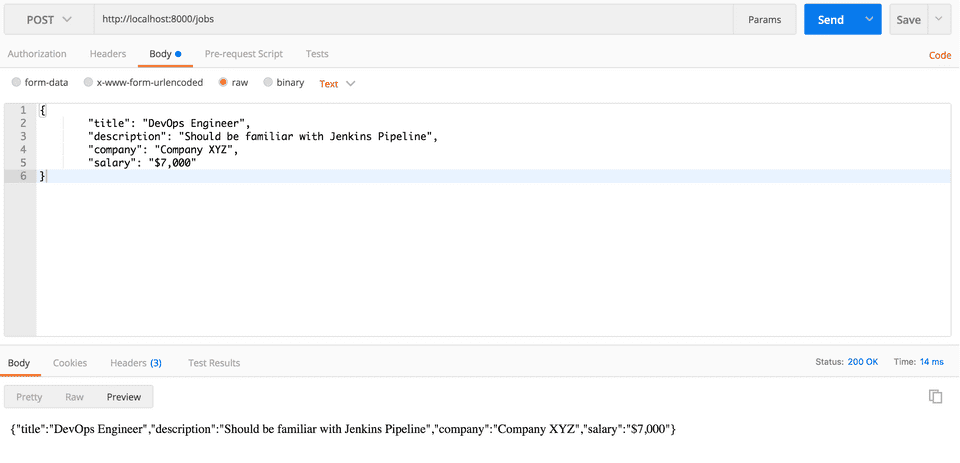
Since MongoDB does not have data yet, let’s insert a sample record. I used Postman but curl will also work! You can use this payload.
{
    "title" : "DevOps Engineer",
    "description" : "Should be familiar with Jenkins Pipeline",
    "company" : "Company XYZ",
    "salary" : "$7,000"
}
To check if the microservie is able to retrieve data from MongoDB, access the GET /jobs endpoint. Using your browser will do of course :)
Entire source code is available in my github repo. https://github.com/donvito/learngo/tree/master/mongo-microservice
Feel free to give me a heads up if you have trouble making the example work!
